7 Tips for Choosing an Aircon Filter Drier
Choosing the right Aircon Filter Drier is a small decision with major consequences. This component traps moisture, acids, dirt, and other contaminants before they damage the compressor or restrict refrigerant flow. A poor match may look acceptable during installation, yet reveal problems months later through rising energy use, noisy operation, or weak cooling.
HVACR educator and author John Tomczyk often stresses the importance of controlling moisture in refrigeration systems. His practical warning is clear: “Moisture is one of the quietest causes of refrigeration trouble.” That idea gives this guide its direction. The following seven tips examine system capacity, refrigerant type, connection size, pressure drop, temperature range, installation position, and replacement timing.
The details matter. A filter drier should suit the system, not merely fit the copper line. Its shell must withstand operating pressure. Its desiccant must match the refrigerant and oil. A technician should also check whether the system experienced compressor burnout, because ordinary replacement may not remove every contaminant.
Small component. Serious responsibility.
There is no perfect selection based on packaging alone. Product labels can be confusing, and some assumptions fail in older air-conditioning systems. That is where careful measurements and manufacturer data become essential. These tips are designed to support informed decisions, not replace professional diagnosis. Experience still matters, especially when an apparently clean system hides moisture, debris, or acid inside the circuit.

Understanding the Role of an Aircon Filter Drier
7 Tips for Choosing an Aircon Filter Drier
Understanding the Role of an Aircon Filter Drier
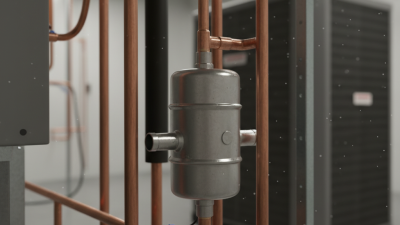
An aircon filter drier protects the refrigeration circuit from moisture, dirt, and harmful chemical residue. Moisture can freeze inside a narrow expansion passage. It can also react with refrigerant oil and create acids. The result may be poor cooling, noisy operation, or compressor damage. A suitable filter drier captures these contaminants while allowing refrigerant to flow with limited pressure loss.
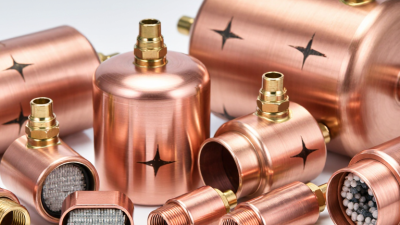
Match the drier with the system’s refrigerant, cooling capacity, connection size, and operating pressure. Check its moisture and dirt-holding capacity, not only its physical size. A pressure-drop chart is useful here. Choose a model designed for the installation direction and expected temperature range. If the system uses a reversible cycle, confirm that the drier supports bidirectional flow. The wrong choice can look acceptable during installation but restrict performance later.
Installation quality matters just as much. Keep the component sealed until use, because the desiccant begins absorbing moisture when exposed to air. Cut and braze tubing carefully, using proper heat protection and dry nitrogen where required. I once saw a replacement fail early because the circuit was opened too long. That lesson still bothers me. Check the sight glass, pressure readings, and temperature difference after commissioning. Replace a restricted or saturated drier rather than cleaning it. Manufacturer data and local technical standards should guide the final selection, even when field experience suggests a quicker solution.
Checking System Compatibility and Refrigerant Requirements
7 Tips for Choosing an Aircon Filter Drier
Tip 1: Check refrigerant compatibility before comparing size or price. A drier must match the refrigerant, compressor oil, pressure range, and operating temperature. ASHRAE Handbook—Refrigeration 2022 stresses that moisture and chemical contamination can damage valves and compressors. Refrigerant blends also need suitable materials and flow direction. Small details matter.
Tip 2: Confirm the system’s connection type and rated capacity. AHRI Standard 710 provides performance requirements for liquid-line filter-driers, including pressure-drop evaluation and moisture-removal performance. A drier that looks correct may restrict flow when the system load rises. I have seen catalog selections fail because installers checked diameter, but ignored capacity. That mistake is easy to repeat.
Tip 3: Match the drier to current refrigerant regulations and future servicing needs. The UNEP/WMO Scientific Assessment of Ozone Depletion 2022 states that the Kigali Amendment could prevent up to 0.4°C of warming by 2100. Lower-impact refrigerants may require different pressure ratings, seals, or desiccant chemistry. Never assume a replacement refrigerant is a direct substitute.
Tip 4: Ask for documented compatibility data. Review the manufacturer’s technical sheet, maximum working pressure, moisture capacity, and approved refrigerants. If the data is unclear, pause the installation. A slightly oversized drier is not always safer. Its pressure drop and oil-return behavior still need checking.
Evaluating Moisture, Contaminant, and Acid Removal Capacity
Choosing an aircon filter drier requires more than matching pipe size. Moisture removal capacity should be your first check. Look for tested water capacity under stated temperature conditions. Ratings can vary sharply between products.
Confirm the drier can capture common contaminants, including copper particles, metal dust, and installation debris. A fine filter is useful, but excessive pressure drop can restrict refrigerant flow. Check the pressure-drop chart at the system’s actual capacity. Acid removal matters after compressor burnout or severe oil degradation. Choose a model with documented acid-neutralizing performance, not vague claims. I once saw a replacement selected only by connection size. It fitted perfectly, yet moisture protection was inadequate.
Review compatibility with the refrigerant and oil used in the system. Some desiccant blends handle polyolester oil differently from mineral oil. Verify the manufacturer’s test data and service temperature range. Consider the system’s refrigerant charge and expected moisture load. A larger shell is not automatically better. Installation direction and flow arrow also matter. Install the drier where it remains accessible for replacement. After commissioning, inspect the sight glass, temperature readings, and pressure difference. A small pressure drop is reassuring, but it does not prove complete moisture removal. Keep records of the installation date and operating conditions. Even experienced technicians can overestimate a drier’s acid capacity. That is worth checking twice.
Choosing the Correct Size, Connection Type, and Installation Position
7 Tips for Choosing an Aircon Filter Drier
Correct sizing starts with refrigeration capacity, refrigerant type, and acceptable pressure drop. The pipe diameter alone is not enough. A drier rated for a larger system may still restrict flow at low temperatures. Check the manufacturer’s capacity tables, pressure-drop curves, and moisture-removal rating. The IEA’s The Future of Cooling report estimates that cooling demand could more than triple by 2050. Small selection errors may therefore affect many future service calls.
Match the connection to the actual tubing outside diameter. Solder, flare, and press connections are not interchangeable in practice. Measure twice. Do not guess. For a standard cooling system, install the drier in the liquid line, with the flow arrow pointing toward the expansion device. Keep it close to that device, while leaving enough space for brazing and replacement. A horizontal position often reduces oil pooling, but the equipment manual should control when space is limited. Field experience shows that an accessible position saves time during commissioning, although I have seen installers place the drier too close to a hot discharge line.
Heat-pump systems need special attention. Use a bi-directional model when refrigerant flow reverses. Otherwise, the drier can obstruct one operating mode. Protect the component from flame, remove internal caps only before connection, and evacuate the system with verified instruments. ASHRAE Handbook—Refrigeration guidance stresses moisture control and proper evacuation because water can promote corrosion, ice formation, and lubricant problems. These details are easy to overlook. Record the selected size, connection type, installation position, and pressure readings in the service report.
7 Tips for Choosing an Aircon Filter Drier
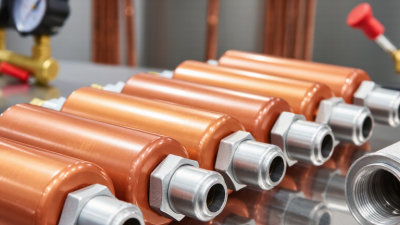
Correct sizing, connection type, and installation position help maintain reliable refrigerant flow and protect the expansion device from moisture and debris.
Common Copper Connection Outside Diameters
Choose a filter drier with a connection that matches the liquid-line tubing. The metric values below are exact conversions from common inch-based copper tube outside diameters; always verify the equipment specification before installation.
- Select the correct capacity for the system’s refrigerant mass flow and operating conditions.
- Match the connection type, such as solder, flare, or threaded, to the existing liquid line.
- Install the drier in the liquid line, normally upstream of the expansion device.
- Follow the flow arrow marked on the filter drier body.
- Keep the drier accessible for inspection and replacement.
- Use clean, dry tubing and prevent moisture from entering during installation.
- Replace the drier after a major compressor burnout or when the system has been opened for contamination-prone repairs.



 Email
 Whatsapp

 WeChat