


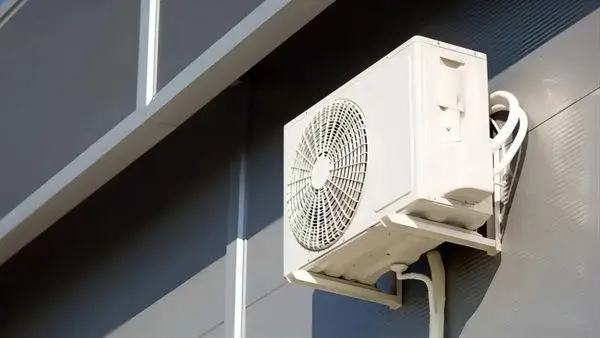


How To Clean Refrigerator Coils

When I clean my refrigerator coils, I notice a real difference in performance. A recent test showed a 0.5% drop in power use and a 17.8% cut in reactive power after cleaning.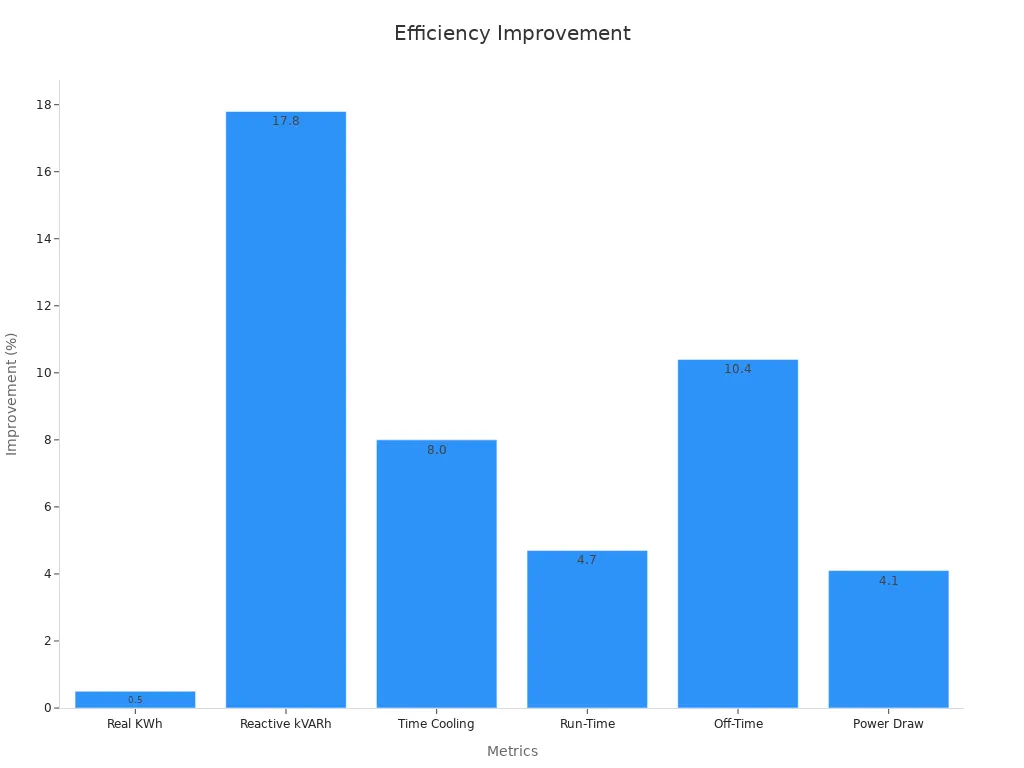
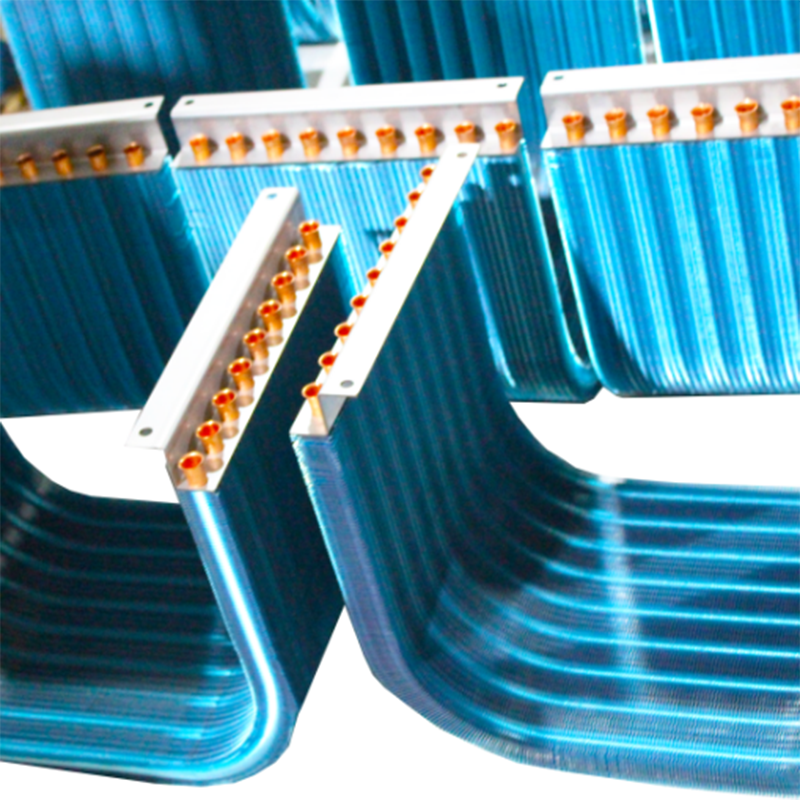
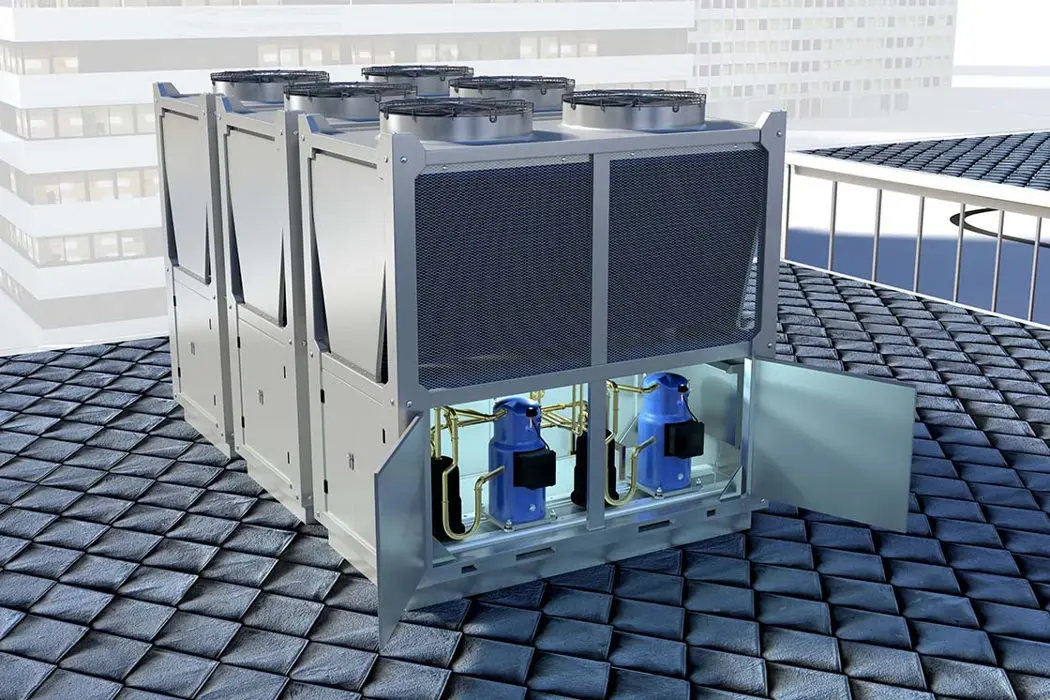
I always check the Wire Tube Condenser as part of this routine.
Key Takeaways
- Regularly clean refrigerator coilsand the Wire Tube Condenser every 6 to 12 months to boost efficiency, lower energy bills, and extend your fridge's lifespan.
- Always unplug the refrigerator before cleaning and use tools like a coil brush, vacuum, and microfiber cloth to safely remove dust and debris from the coils.
- Watch for signs like longer running times, higher energy bills, or visible dust buildup to know when it's time to clean, and seek professional help if you find damage.
Why Clean Refrigerator Coils and Wire Tube Condenser

What Are Refrigerator Coils and Wire Tube Condenser
When I look at my refrigerator, I know the coils and the Wire Tube Condenserplay a crucial role in keeping everything cold. The Condenser Coil acts as a heat exchanger. It receives hot, high-pressure refrigerant vapor from the compressor and cools it down as it passes through the coils or tubes. This process turns the vapor into a liquid, which is essential for the refrigeration cycle. The Wire Tube Condenser, often found on the back or underneath the fridge, uses a network of tubes and fins to release heat into the surrounding air. This setup works much like a car radiator, helping the refrigerator maintain the right temperature inside.
Why Cleaning Matters for Efficiency and Lifespan
I have seen firsthand how dust and debris can build up on these coils and the Wire Tube Condenser. When this happens, the system struggles to release heat, forcing the compressor to work harder. Here are some key benefits of keeping them clean:
- Boosts efficiency and reduces energy bills.
- Prevents overheating and potential breakdowns.
- Extends the lifespan of the refrigerator, sometimes beyond 15 years.
- Maintains healthy indoor air by preventing mold and refrigerant leaks.
Cleaning can improve efficiency by up to 30%. Dirty coils can cause the fridge to use up to 37% more energy, which means higher utility costs and more wear on the appliance.
Signs Your Coils Need Cleaning
I always watch for these signs that tell me it’s time to clean:
- The refrigerator runs longer or more often than usual.
- I notice higher energy bills.
- The fridge feels hot to the touch or overheats.
- I see dust or lint buildup on the coils during a quick visual check.
Tip: Regular cleaning every six months keeps your refrigerator and Wire Tube Condenser running smoothly and efficiently.
Tools, Safety, and Step-by-Step Cleaning Guide

Tools and Supplies You’ll Need
When I prepare to clean my refrigerator coils, I gather all the necessary tools first. This makes the process smoother and safer. Based on expert recommendations and manufacturer guidelines, I use the following:
- Stiff coil cleaning brush (bendable, about 2 feet long)
- Vacuum cleaner with a hose and brush attachment
- Screwdriver (for removing panels or grilles)
- Work gloves and a dust mask
- Soft microfiber cloth
- Mild detergent or noncaustic coil cleaner
- Fin straightener (optional, for bent coil fins)
- Flashlight (to see dust in dark areas)
- Compressed air (for hard-to-reach spots)
Tip: I always check my refrigerator’s manual before starting. It helps me locate the coils and understand how to remove any panels safely.
Safety Tips Before You Start
Safety comes first every time I clean refrigerator coils. I follow these essential precautions:
- I always unplug the refrigerator before starting. This step prevents electrical hazards and is a standard safety practice among appliance professionals.
- I wear protective gloves to shield my hands from sharp edges and dust.
- I use a dust mask to avoid inhaling debris.
- I make sure the area is well-ventilated, especially if I use any cleaning solutions.
- I keep water and cleaning liquids away from electrical components.
Note: Unplugging the refrigerator is the most important step. I never skip it, no matter how quick the job seems.
How to Unplug and Access the Coils
I start by unplugging the refrigerator from the wall outlet. This simple action keeps me safe from electric shock. Next, I locate the coils. On most modern refrigerators, the coils sit behind a kickplate or grille at the bottom front. Older models often have coils on the back.
Here’s how I access them:
- I unplug the refrigerator.
- I check the manual to confirm the coil location.
- If the coils are behind a front grille, I remove it by unclipping or unscrewing it with a screwdriver.
- If the coils are on the back, I carefully pull the fridge away from the wall and unscrew the back panel.
- I set aside all screws and panels in a safe spot for reassembly.
Tip: I use a flashlight to inspect the area and spot any dust buildup before I start cleaning.
Cleaning the Coils with a Brush and Vacuum
Once I have access, I use a combination of brushing and vacuuming for the best results. I start with the vacuum’s brush attachment to remove loose dust and debris. Then, I use a coil cleaning brush to reach between the coils and dislodge stubborn dirt.
Here’s my process:
- I vacuum the coils gently, using the hose and brush attachment.
- I use the coil brush to loosen dust in tight spaces.
- I vacuum again to pick up any debris the brush dislodged.
- For hard-to-reach spots, I use compressed air to blow out dust.
- I wipe the coils with a damp microfiber cloth to remove any remaining dirt.
This method ensures I clean both the surface and the hidden areas. Regular cleaning like this can improve refrigerator efficiency by up to 25% and prevent breakdowns.
Wiping Down and Reattaching Panels
After cleaning the coils, I wipe down the surrounding area with a damp cloth. I make sure everything is dry before reassembling. I carefully reattach the grille or panel, securing it with screws or clips.
Note: I double-check that all panels are firmly in place. This prevents rattling and keeps dust out.
Plugging In and Final Checks
With everything back in place, I plug the refrigerator back in. I listen for any unusual noises and check that the unit starts up smoothly. I monitor the temperature over the next few hours to ensure it returns to the correct setting.
I also inspect the area for any leftover debris or misplaced screws. I make sure the vents and fans are unobstructed and working properly. This final check gives me peace of mind that my refrigerator is running safely and efficiently.
Troubleshooting Common Issues
Sometimes, I encounter issues during or after cleaning. Here’s how I handle the most common ones:
- If the refrigerator does not cool properly, I check the condenser fan for obstructions and make sure the door seals are intact.
- If I hear unusual noises, I inspect the panels and fans for loose parts.
- If the coils seem bent, I use a fin straightener to gently realign them.
- If I notice persistent dust buildup, I consider cleaning more frequently, especially if I have pets or live in a dusty area.
Tip: If I ever feel unsure or notice persistent problems, I contact a professional technician. Regular cleaning, at least twice a year, keeps my refrigerator running efficiently and extends its lifespan.
About senjun and Wire Tube Condenser Solutions
senjun Company Introduction
When I look for reliable partners in refrigeration technology, I always consider senjun. Ningbo Senjun New Materials Co., Ltd. stands out in the industry. I know this company focuses on research, development, and production of advanced heat exchange solutions. Their product range covers wire tube condensers and copper aluminum fin heat exchangers. I see their products in refrigerators, freezers, drinking fountains, display cabinets, wine cabinets, medical ultra-low temperature refrigerators, ice makers, and dehumidifiers. I trust senjun because they commit to quality and innovation in every project.
Note: I have found that senjun’s dedication to new materials and efficient cooling technology helps their clients achieve better performance and reliability.
senjun’s Expertise in Wire Tube Condenser Manufacturing
I have seen senjun’s expertise in Wire Tube Condenser manufacturing firsthand. They use advanced production techniques and strict quality control. Their engineers design each Wire Tube Condenser to maximize heat exchange and energy efficiency. I notice that their solutions meet the needs of both commercial and residential appliances. When I choose senjun, I know I am getting a product that supports long-term performance and durability. Their focus on continuous improvement keeps them at the forefront of the refrigeration industry.
- I recommend senjun for anyone who values dependable cooling and innovative engineering.
- Their Wire Tube Condenser solutions help appliances run efficiently and last longer.
I keep my refrigerator running efficiently by cleaning the coils and the Wire Tube Condenser every 6 to 12 months. Regular maintenance prevents costly repairs and lowers energy bills.
- Studies show a 20% efficiency boost and a 3-year lifespan extension for appliances with routine coil cleaning.
FAQ
How often should I clean my refrigerator coils?
I clean my refrigerator coils every 6 to 12 months. If I have pets or live in a dusty area, I check and clean them more often.
Can I use water to clean the coils?
I use a damp microfiber cloth for final wiping. I never soak the coils or let water drip onto electrical parts.
What if I see damage on the coils?
- I stop cleaning immediately.
- I contact a professional technician for repairs.
- I avoid using the refrigerator until it is checked.